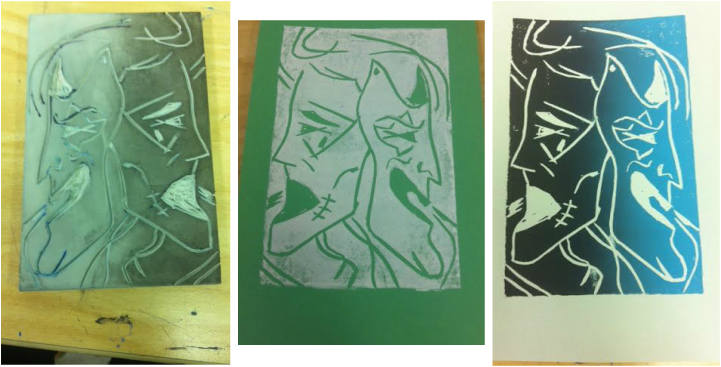
When making a linoleum cut first you need to sketch your drawing to the scale of the linocut. Once you have your drawing you need to color the back of your sketch with a graphite pencil. Then place your sketch on the linocut and trace over all lines in your sketch, transferring them onto the linocut. Once the lines are on the linocut trace over them with a permanent marker. Then use a speedball cutter to remove the parts of the linocut that you want to be white space when you print it. Once all of your linocut is sketched and cut out you are ready to print. You will then get a bench hook and put ink on the top and use a brayer to spread the ink on the bench hook. Once the ink is spread evenly on the brayer you can roll the brayer on the linocut and apply an even layer of ink onto the linocut. Once this is done you place paper on top of the linocut rubbing the paper to transfer the ink onto it. Once you have applied pressure to the paper you can slowly remove it and you have your print. You can continue to print as many prints as you want. The picture on the left below shows the linocut after it has been cut out and then the first print is in the middle. After lots of prints my favorite is on the far right with two different colored inks meeting in the middle.
 RSS Feed